


How to Install a Shower System with Body Jets: Step-by-Step Guide

Introduction
A shower system with body jets can turn a normal bathroom into a spa-style shower experience. With a rainfall shower head, handheld shower, control valve, diverter, and body jets, the system gives better water coverage and a more luxurious feel.
Installing a shower system with body jets requires careful planning because several outlets share water pressure. The wall must be opened, plumbing lines must be positioned correctly, and the system must be tested before the wall is closed. For best results, hire a licensed plumber, especially for rough-in plumbing, valve installation, waterproofing, and local code requirements.
What Is a Shower System with Body Jets?
A shower system with body jets is a multi-function shower setup that usually includes:
-
Rain shower head
-
Handheld shower wand
-
Body jets or body sprays
-
Pressure balance or thermostatic valve
-
Diverter valve
-
Hot and cold water supply lines
-
Rough-in valve body
-
Trim plate and controls
Body jets are installed in the wall and spray water toward the body. They are usually placed around shoulder, back, waist, or lower-body height depending on the user’s comfort.
Before You Start: Important Planning Tips
Before installation, check these points:
-
Water pressure: Body jets need enough pressure to perform well. If your home has weak pressure, the jets may feel weak when used with the shower head.
-
Water flow: Multiple outlets use more water. Make sure your plumbing system can support the shower head, handheld shower, and jets.
-
Valve type: A pressure balance or thermostatic valve helps protect against sudden temperature changes.
-
Wall depth: Make sure the valve and body jets fit inside the wall cavity.
-
Local code: Plumbing rules can vary by province, city, or building type. Always confirm before closing the wall.
-
Access: Plan future access where possible, especially for valves and connections.
Tools and Materials Needed
You may need:
-
Shower system with body jets
-
Rough-in valve and trim kit
-
Diverter valve
-
PEX or copper piping
-
Fittings and elbows
-
Pipe cutter
-
Level
-
Measuring tape
-
Drill
-
Screwdriver
-
Adjustable wrench
-
Plumber’s tape
-
Waterproof backer board
-
Waterproofing membrane
-
Tile and grout
-
Silicone sealant
-
Safety glasses and gloves
Recommended Body Jet Layout
A common layout is to install body jets in a vertical line or in two vertical rows. The best position depends on user height and shower size.
Typical placement ideas:
-
Upper jets: shoulder and upper back area
-
Middle jets: waist and lower back area
-
Lower jets: thigh or leg area
For a 4-body-jet shower system, a popular layout is two jets on the left side and two jets on the right side, aligned evenly for full-body coverage.
Simple Shower Body Jet Drawing
Use this drawing as a basic layout idea:
            Ceiling / Wall Area
        ┌─────────────────────────┐
        │       Rain Shower       │
        │            ○            │
        │                         │
        │   ○                 ○   │  ← Upper body jets
        │                         │
        │        Control Valve    │
        │             ◉           │
        │                         │
        │   ○                 ○   │  ← Lower body jets
        │                         │
        │      Handheld Shower    │
        │            │            │
        └─────────────────────────┘
              Finished Shower Wall
This drawing is for planning only. Final measurements should be adjusted to the user’s height, shower size, plumbing layout, and product installation manual.
Step-by-Step Installation Guide
Step 1: Turn Off the Water Supply
Turn off the main water supply before starting. Open the existing shower valve to release pressure from the lines. If this is a renovation, remove the old trim, valve, shower arm, and wall covering as needed.
Step 2: Open the Wall
Open the shower wall where the valve, diverter, and body jets will be installed. The plumber needs enough space to route the hot and cold lines, connect the outlets, and secure the valve body.
Check the wall studs and make sure the components can fit without forcing the pipes into tight or unsafe positions.
Step 3: Mark the Valve and Jet Positions
Use a level and measuring tape to mark the exact locations for:
-
Main mixing valve
-
Diverter valve
-
Body jets
-
Shower head outlet
-
Handheld shower outlet
Keep the controls easy to reach. The body jets should line up comfortably with the user’s body, not directly at the face.
Step 4: Install the Rough-In Valve
Install the rough-in valve according to the manufacturer’s instructions. The valve must be set at the correct depth so the trim plate fits properly after tile is installed.
This step is very important. If the valve is too deep or too shallow, the finished trim may not sit correctly on the wall.
Step 5: Connect Hot and Cold Water Lines
Connect the hot and cold supply lines to the valve. Make sure the hot side and cold side are not reversed. Secure all pipes properly to reduce movement, vibration, and noise.
For safety, the shower should use a valve designed to reduce the risk of sudden temperature changes.
Step 6: Install the Diverter
The diverter controls which function is used, such as the rain shower, handheld shower, or body jets. Some systems allow one function at a time, while others allow shared functions depending on the valve design and water pressure.
Follow the product instructions carefully so each outlet connects to the correct diverter port.
Step 7: Create a Pressure-Balanced Loop for the Body Jets
This is one of the most important steps when installing body jets. The body jets should not be connected in a simple straight line where the first jet gets stronger pressure and the last jet gets weaker pressure.
Instead, the body jets should be connected with a pressure-balanced loop. A loop means the water line feeds around the body jets in a closed circuit, helping each jet receive more equal pressure. This gives a cleaner, more even spray from all jets.
For a 4-body-jet system, the plumber should run the outlet line from the diverter into a loop that connects all four body jets and returns around the circuit. This helps balance water flow between the upper and lower jets.
Basic loop idea:
        Body Jet Loop Layout

        ○────────────○
        │            │
        │            │
        │            │
        ○────────────○
             ↑
        Water feed from diverter
The loop must be sized and installed according to the shower system requirements, pipe size, valve capacity, and local plumbing code. A licensed plumber should confirm the correct pipe size and layout before closing the wall.
Step 8: Secure the Body Jet Rough-Ins
Install and secure the body jet rough-in fittings at the marked locations. Make sure each outlet is level, straight, and set at the correct depth for the finished wall.
A small mistake at this stage can make the finished jets look uneven after tile is installed.
Step 9: Pressure Test the System
Before closing the wall, turn the water back on and test the system. Check every connection for leaks.
Test:
-
Hot and cold water connection
-
Valve operation
-
Diverter operation
-
Shower head outlet
-
Handheld outlet
-
Each body jet outlet
Do not close the wall until the system passes a full leak test.
Step 10: Waterproof the Shower Wall
After plumbing is tested, install waterproof backer board and waterproofing membrane. This step protects the wall from moisture damage.
Waterproofing is one of the most important parts of a shower installation. Poor waterproofing can cause mold, wall damage, and expensive repairs.
Step 11: Tile the Shower Wall
Install tile around the valve, diverter, body jets, and shower outlets. Cut openings carefully so the trim pieces cover the edges cleanly.
Do not make the holes too large. Large gaps can make sealing difficult and may affect the finished look.
Step 12: Install Trim, Jets, Shower Head, and Handheld
After the tile is complete, install the finished trim:
-
Valve trim plate and handle
-
Diverter trim
-
Body jet faces
-
Shower arm and shower head
-
Handheld bracket or slide bar
-
Hose and handheld shower
Use plumber’s tape where required by the manufacturer, but do not over-tighten finished parts.
Step 13: Seal Around Fixtures
Apply bathroom-grade silicone around trim areas where needed. Do not block designed drainage or weep points. The goal is to stop water from entering behind the wall while keeping the fixture installed correctly.
Step 14: Final Test
Turn on the water and test each function again. Check for:
-
Leaks
-
Even body jet spray
-
Correct hot and cold direction
-
Stable water temperature
-
Smooth diverter operation
-
Secure trim pieces
Let the shower run for several minutes and inspect carefully.
Common Mistakes to Avoid
Avoid these installation mistakes:
-
Installing body jets too high or too low
-
Forgetting to check water pressure
-
Closing the wall before leak testing
-
Using an incorrect valve depth
-
Reversing hot and cold lines
-
Not waterproofing properly
-
Installing body jets without a pressure-balanced loop
-
Ignoring the manufacturer’s installation manual
-
Assuming every shower system can run all functions at once
Can You Install a Shower System with Body Jets Yourself?
Some experienced DIY homeowners can handle parts of the project, such as removing old trim or helping with layout planning. However, the plumbing rough-in, valve installation, pressure testing, and waterproofing should usually be handled by a licensed plumber or qualified installer.
A shower system with body jets is more complex than a standard shower because it has multiple outlets inside the wall. A small leak behind the wall can become a major repair later.
Maintenance Tips After Installation
To keep the shower system working well:
-
Clean body jet nozzles regularly
-
Wipe the shower fixtures after use
-
Avoid harsh chemicals on the finish
-
Check silicone seals over time
-
Remove mineral buildup from spray holes
-
Test diverter functions occasionally
For matte black, brushed gold, chrome, or brushed nickel finishes, use a soft cloth and mild soap. Avoid abrasive pads or strong cleaners.
FAQ
How high should shower body jets be installed?
Body jets are commonly placed around shoulder, back, waist, or thigh height. The best height depends on the user’s body height and the shower layout.
Do body jets need more water pressure?
Yes. Body jets can require stronger water pressure and flow than a basic shower head. If pressure is low, the jets may not perform well.
Can I use the rain shower and body jets at the same time?
It depends on the valve, diverter, and home water pressure. Some systems allow multiple functions, while others are designed for one function at a time.
Are body jets worth it?
Body jets are a great upgrade for homeowners who want a spa-style shower, better water coverage, and a luxury bathroom design.
Do I need a plumber to install a shower system with body jets?
A licensed plumber is strongly recommended. The system requires proper valve installation, balanced piping, pressure testing, and code-compliant plumbing.
Conclusion
Installing a shower system with body jets is one of the best ways to upgrade a bathroom with a luxury spa feeling. The key to a successful installation is planning the layout, using the right valve, creating a proper pressure-balanced loop for the body jets, testing for leaks, and waterproofing the wall properly before finishing with tile.
For best results, choose a high-quality shower system and work with a qualified installer. A properly installed shower system with body jets can improve comfort, style, and the overall value of your bathroom.
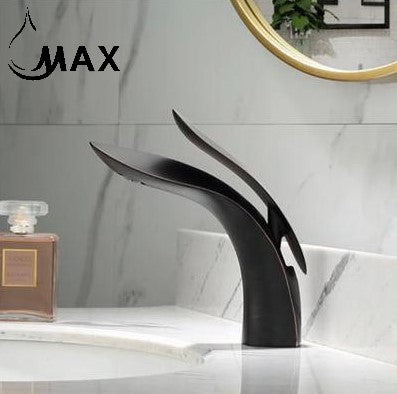
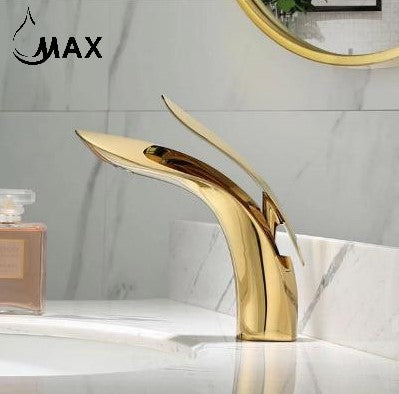
Sample Image Gallery


